8. Understand Attendees' Experience
1. Create your Virtual Event
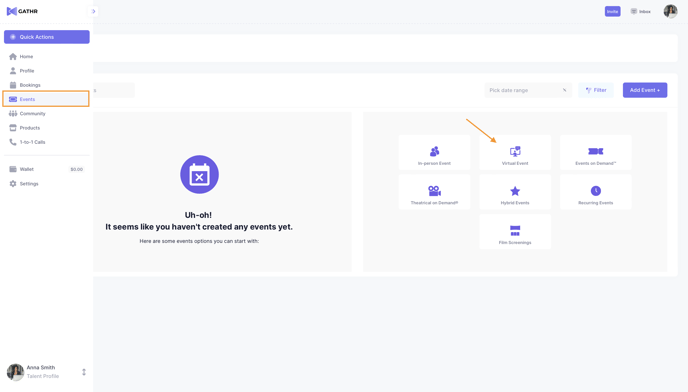
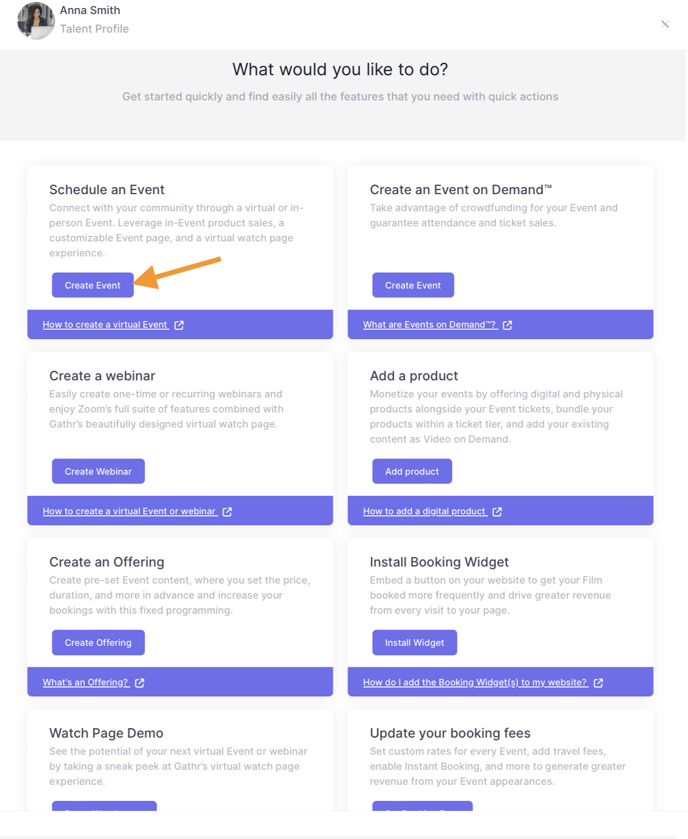
Create an Event
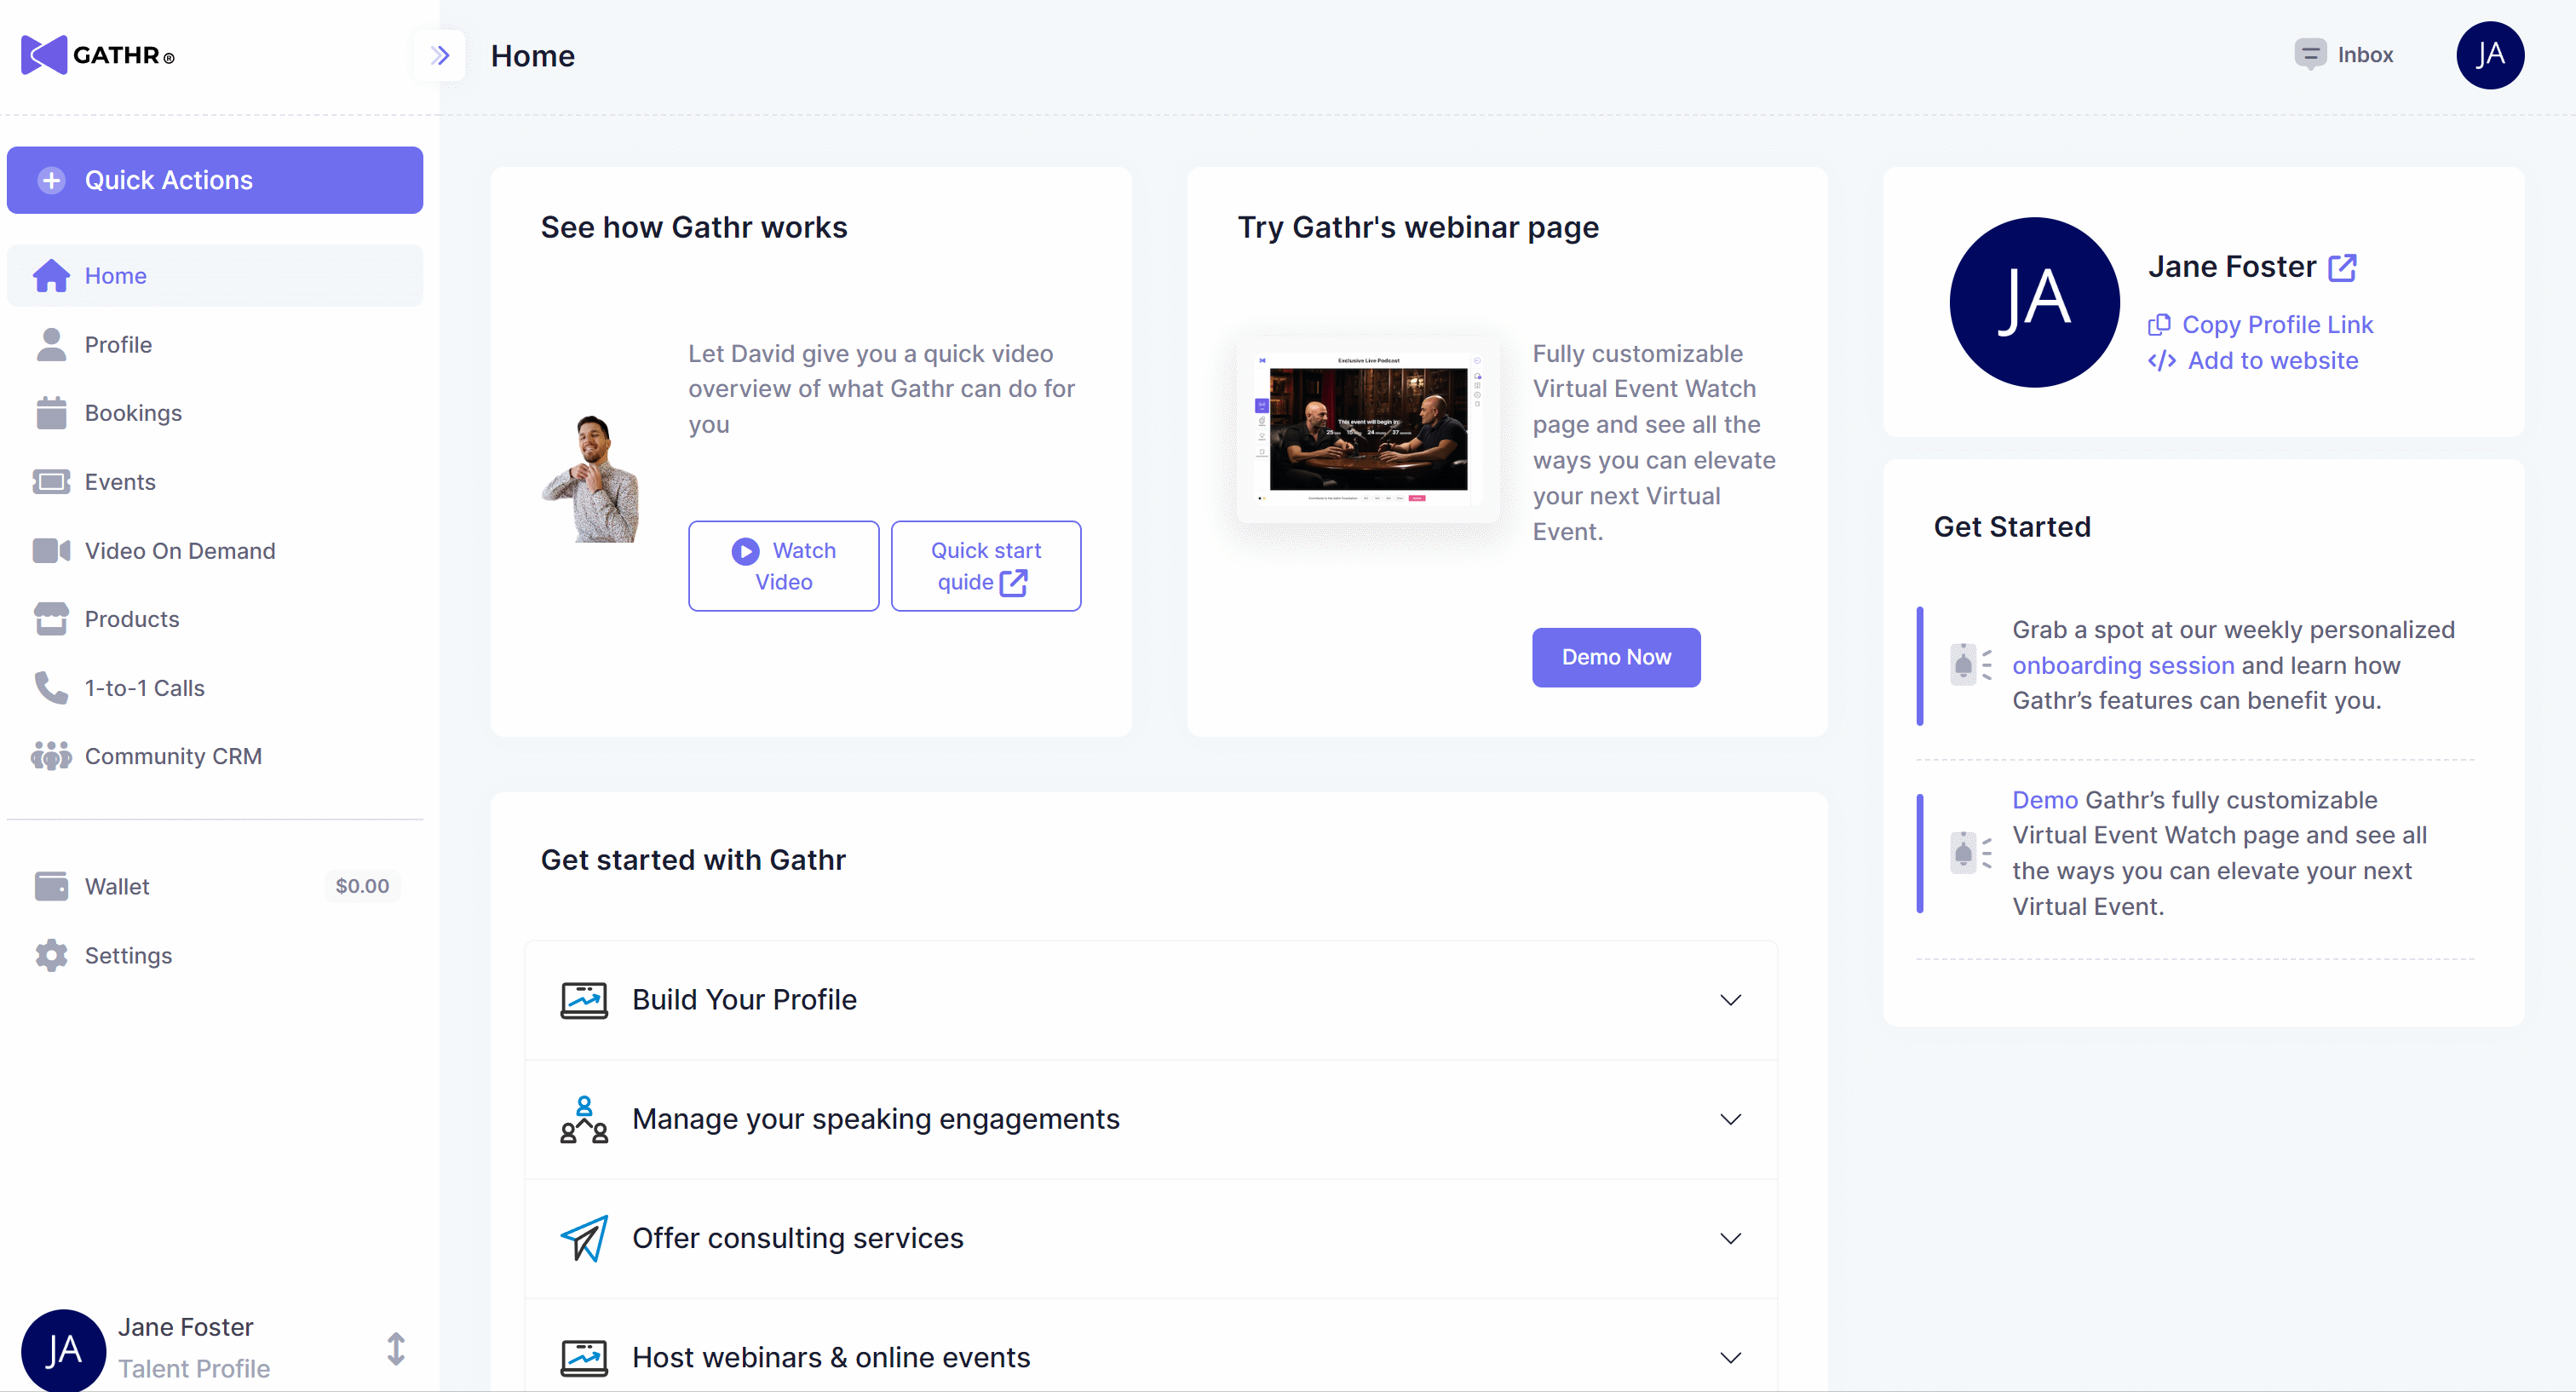
On your Dashboard, access "Events" tab from the left sidebar menu and then choose "Virtual Event." Or, click on "Quick Actions" and select "Schedule Event."
2. Set Up Your Event
Fill in some basic information about your Event.
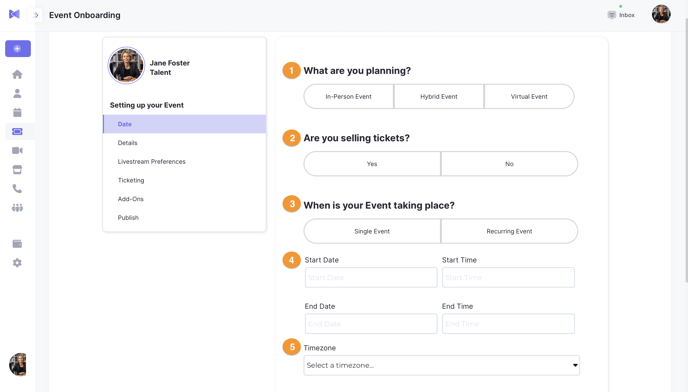
- Event format- Plan a virtual Event or a hybrid Event.
- Ticketing - Choose to sell tickets or have a free Event.
- Single Event or Recurring Event - Is this a one-off Event, or does it repeat more than once?
- Event time/date - When will your Event happen? Outline start times and dates.
- Time zone - Gathr.com pre-selects your likely time zone. You can also set it manually using this drop-down menu.
Are you planning a multi-day virtual Event?
Some Events start on one date and end days after. For example, a conference or a convention runs from Friday, July 1, at 9:00 AM to Sunday, July 3, at 4:00 PM. To host a multi-day event, set your Event Start Dates/Times and End Dates/Times accordingly: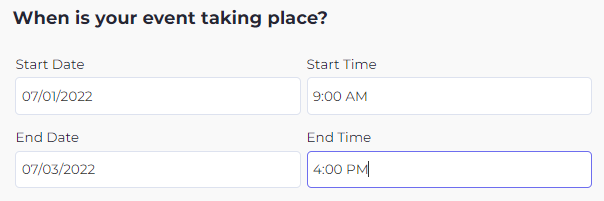 Throughout your multi-day virtual Event, Attendees enjoy free re-entry to your Event Watch Page. Please be sure to put your Event schedule in your Event Description when setting up your Event page so your Attendees know what's happening and when at your Event.
3. Create your Event page
Build interest in your Event by adding a cover photo, title, and other descriptors.
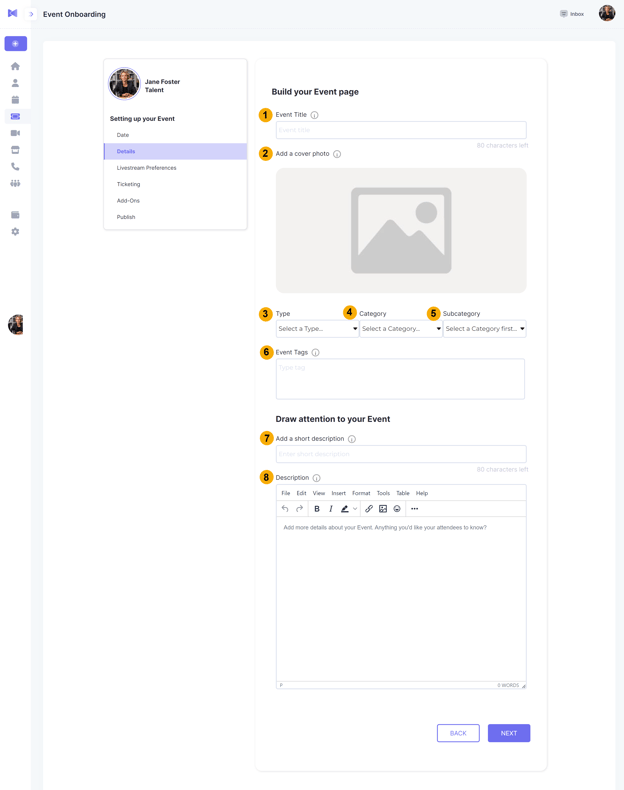
- Event Title- What's your Event called?
- Cover Photo - Add a photo to display on your Event page.
- Event Type - What kind of Event is it? (required)
- Category - Be specific to attract your target audience (required).
- Subcategory - Give your audience an idea of what they're attending (required).
- Event tags - Add keywords to set off your Event in search results (optional).
- Short Description - Give a summary of your Event.
- Description - Give details about the Event you want your audience to know.
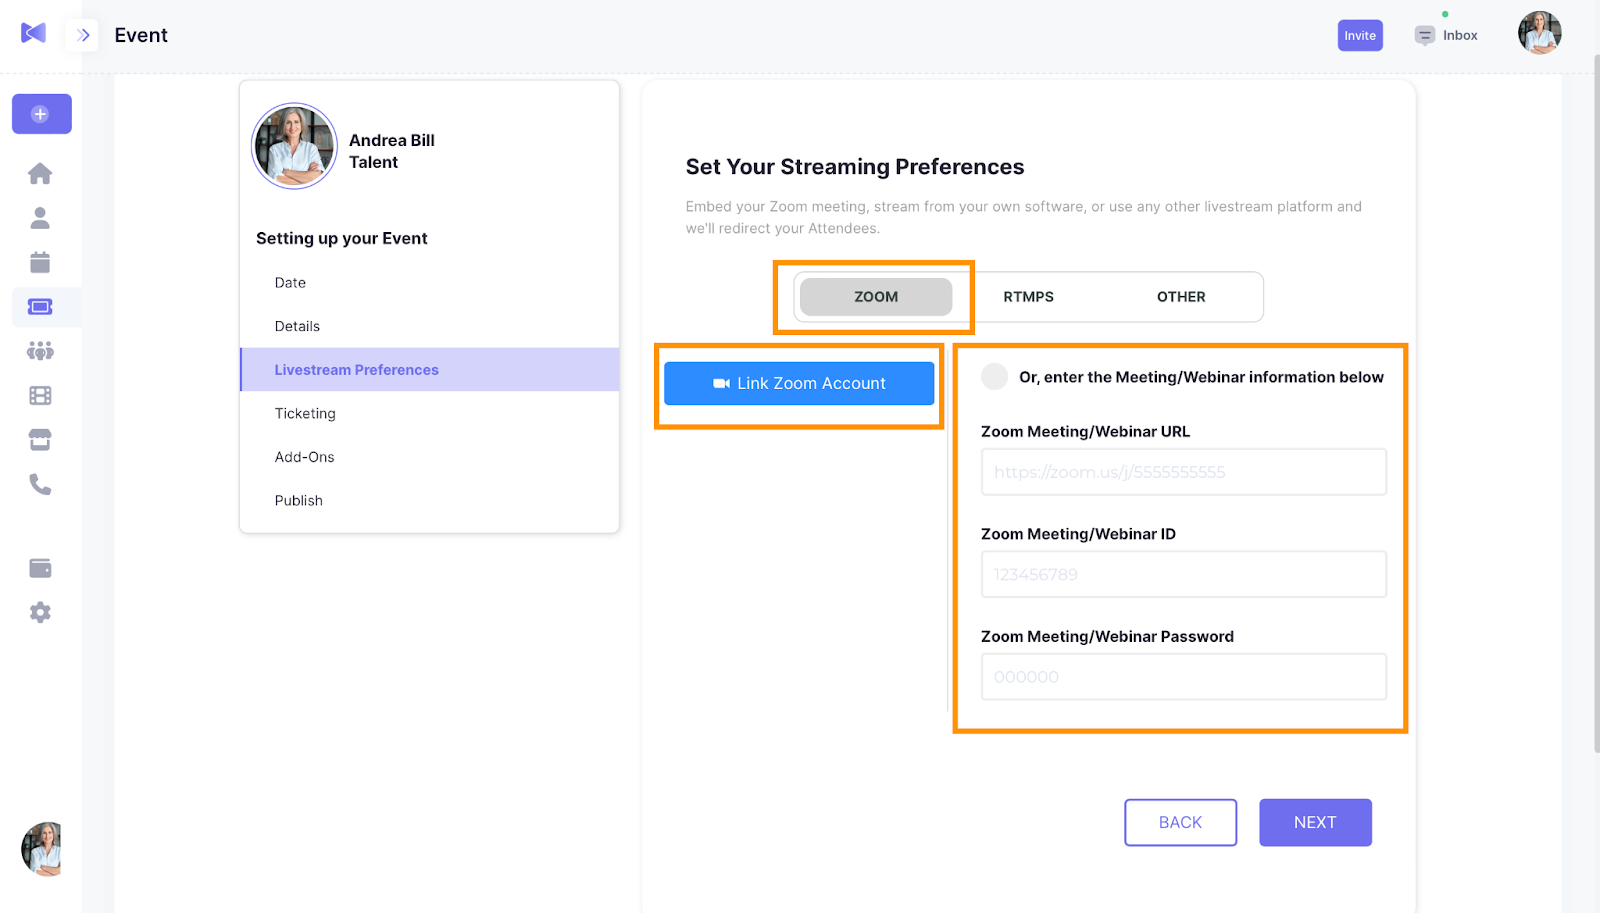
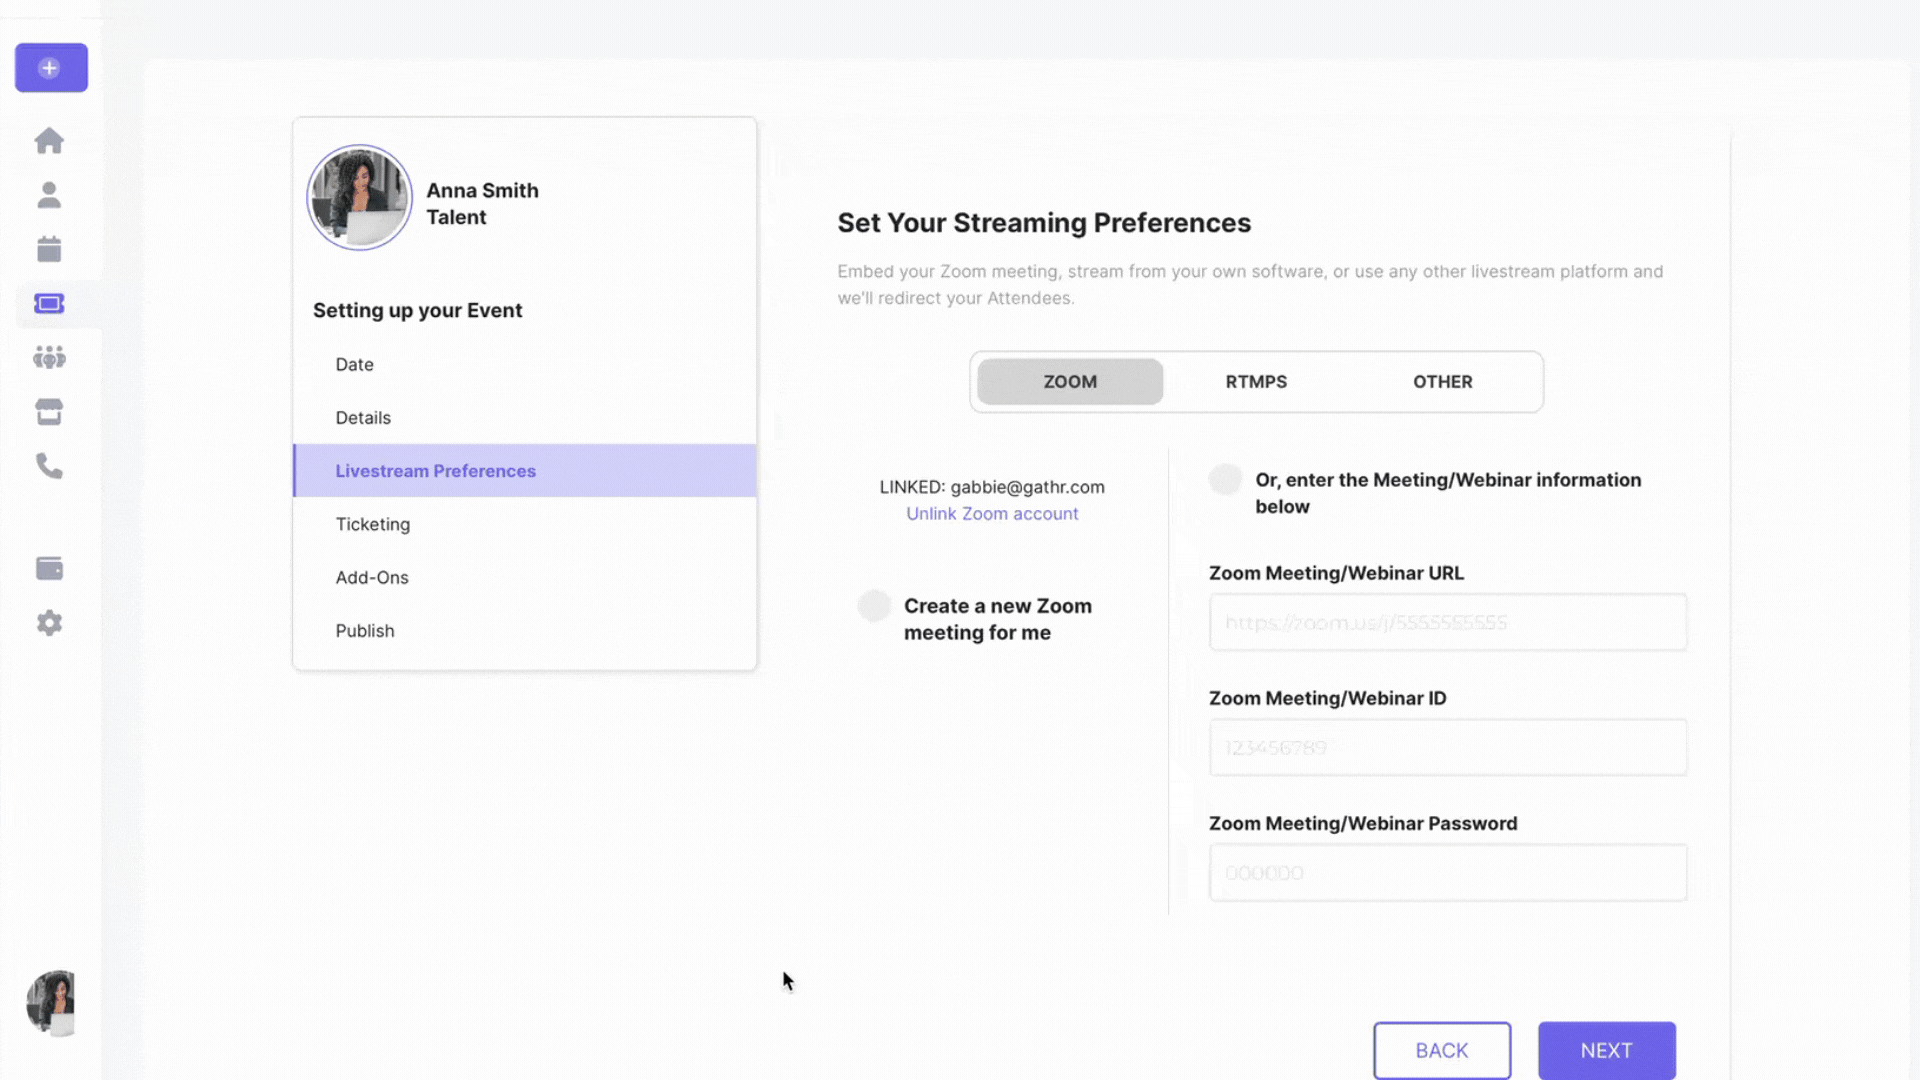
4. Set your Livestream Preferences
If you are creating a new Event, select Zoom. Then, you can either:
-
- Link your Zoom Account with Gathr (recommended).
- Input your Zoom Meeting/Webinar information manually.
Linking your Zoom account
When you link your Zoom account, you'll be redirected to a Zoom log-in page and required to sign into Zoom.
Once that's done, you'll see an option to "Create a new Zoom meeting for me" or "Create a new Zoom webinar for me" (if you have a Webinar level Zoom account):
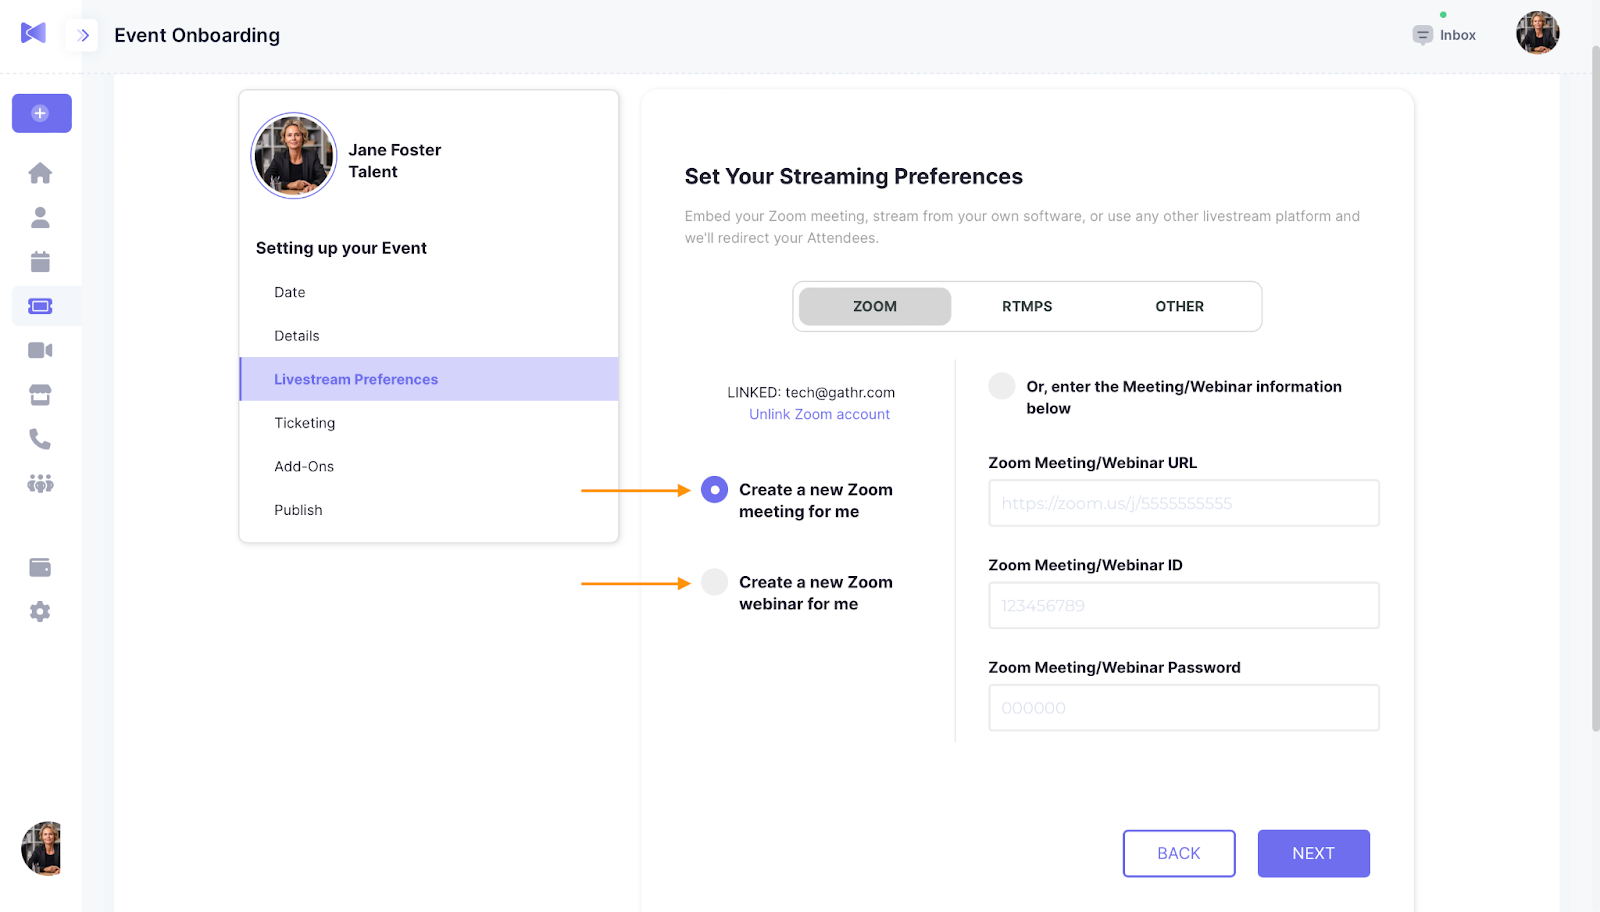
Next, choose from the two options:
-
- Create a new Zoom meeting for me.
- Create a new Zoom webinar for me.
Create a new Zoom meeting/webinar for me: Save time by linking your Zoom account directly with Gathr, and create your Zoom meeting or webinar in a few clicks. When you create your Event on Gathr, your Zoom meeting or webinar is created simultaneously - no need to re-enter start times, dates, or the Event name in the Zoom app.
When it's time to start your Event, simply open your Zoom desktop app using your linked Zoom account, and find the meeting/webinar that was automatically created - the name of the meeting/webinar will be the same as your Event.
If you linked a 3rd party Zoom account to Gathr when you created your Event or if you aren't hosting the Event yourself, then you'll need to share your Zoom login credentials with the Event host, so they can start the Zoom meeting/webinar by logging in to your Zoom account and starting the Zoom meeting/webinar.
Entering meeting information manually
Enter the Zoom meeting/webinar URL, meeting ID, and passcode manually.

Note: Make sure your Zoom meeting/webinar URL includes the meeting or webinar's encrypted passcode:
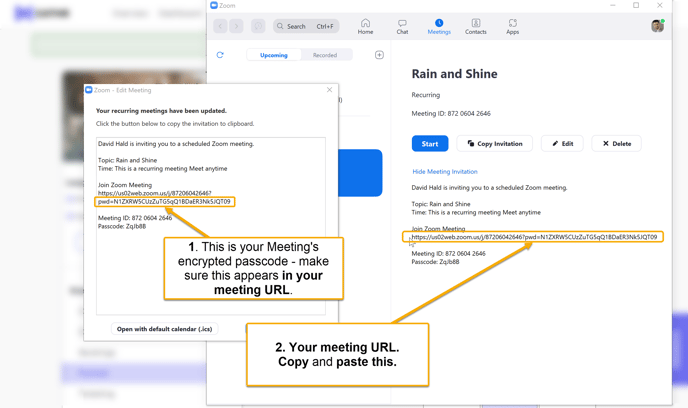
Copy and paste the meeting URL, meeting/webinar ID, and passcode from Zoom into the fields:
When you enter your Zoom meeting/webinar details manually, be sure to double check your Zoom settings on your Zoom dashboard.
Recommended settings for meetings/webinars:
- Enable Host to mute all participants*
- Mute all participants upon joining Event*
Learn more about how to adjust your Zoom settings
*Zoom meetings only
5. Publish your Event
Next, set and save Ticket Tiers for your Event, include any Product Add-Ons, and Publish your Event.

Nicely done! You've successfully set up your Event with Zoom.
6. Start your Event
To begin your Event, you can do so directly from your Gathr Dashboard using the green Join button for your Event.
Be sure to allow permissions to your microphone and camera, and select the blue Join Event or Join Audio by Computer so your audience can see and hear you doing your Event.
Attendees and Panelists can join your virtual Event from their ticket confirmation / Panelist invitation emails via your Event Watch page, where they can see any additions you've made, like Audience chat, Audience map, Product Add-Ons, or donations buttons.
Tip: For the best virtual Event experience, Gathr recommends using the latest Google Chrome version for all Zoom Events.
Learn more about Gathr's recommended best practices for your virtual Event.
Go Live - Your Event goes live when you start the meeting from your Dashboard, and your Attendees will see the embedded Zoom Event directly on the Event Watch page.
Understand your Attendees' experience
1. Attendees find and buy tickets for your Event
Since your Event is online, Attendees can buy tickets from anywhere in the world. They'll even see the correct times in their time zones so they know when to attend your Event.
2. Attendees receive a link to your Event Watch page
This link arrives at the email address they used to register with Gathr after they purchase/reserve tickets for your Event.
3. Attendees join your Event
To access your Event, Attendees enter using the link from their order confirmation email.
Note: If an Attendee joins your Event on a mobile device, they will open it in Zoom mobile app.
4. Before your Event starts
Attendees enter the "lobby" of your Event. They can see a countdown clock until showtime, a background video, and additional widgets you added to your Watch page. Additional widgets will be visible before, during, and after the Event (the map widget is not visible after the Event).
Learn more about your Watch page to understand precisely what Attendees see during each part of your Event.
Learn more about Attendees' experience: How to Join a Virtual Event.