Virtual Event Tech Check
Don't let tech issues get in the way of your Event.
Go into your Event confident by following these tips to ensure an excellent Event experience:
1. Best Practices
For the best possible virtual Event experience, follow these best practices.
- Use Google Chrome for its across-the-board compatibility and know you'll always have the latest version. Gathr User feedback consistently reports that Chrome provides a smooth experience using a PC or a Mac.
- Close any other open applications or tabs to maximize your device's performance during your Event. For the smoothest streaming video performance, it's best to free up memory space by closing any extraneous programs or browser windows.
- Use a cabled internet connection instead of WiFi. The best virtual Event experiences stream smoothly without buffering or pauses. To achieve that, it's critical to have a high-speed stable internet connection. Remember that WiFi can sometimes have "dead spots," where video and sound can pause or buffer, which transmit to your audience. When you use a cabled internet connection, speeds are more consistent.
- Test your connection speed before your Event begins. Do this at speedtest.net or directly from your internet service provider.
If your upload speed is less than 40 Mbps, we recommend you turn off your camera for your Event.
If your upload speed is less than 20 Mbps, we strongly recommend you find a faster connection. Such low speeds can cause problems with your video and screen share, and Attendees may request refunds as a result.
- Anticipate your Audience by always letting them into the Event promptly, if using Zoom. Also, don't forget about the Event chat - your Attendees will want to interact with you, so be sure to check the chat often. For any technical issues, remind the audience to allow browser permissions and enable microphone, audio, and camera. Also, encourage Attendees to refresh the page after adjusting their settings - this solves many common issues.
- Do a tech check before your Event starts.
Think of this as a dress rehearsal for your Event.
Take the time to get your streaming device and accessory setup Event-ready with any lights, microphones, cameras, or other equipment. Have all this pre-set, so you can ensure everything works like it's supposed to.
2. Understand how to start and join your Event
It's critical to know how you will start your Event when it's time to begin.
Going live with your Event is a little different for each platform. Here are examples of how to begin your Event using different live stream platforms:
Zoom
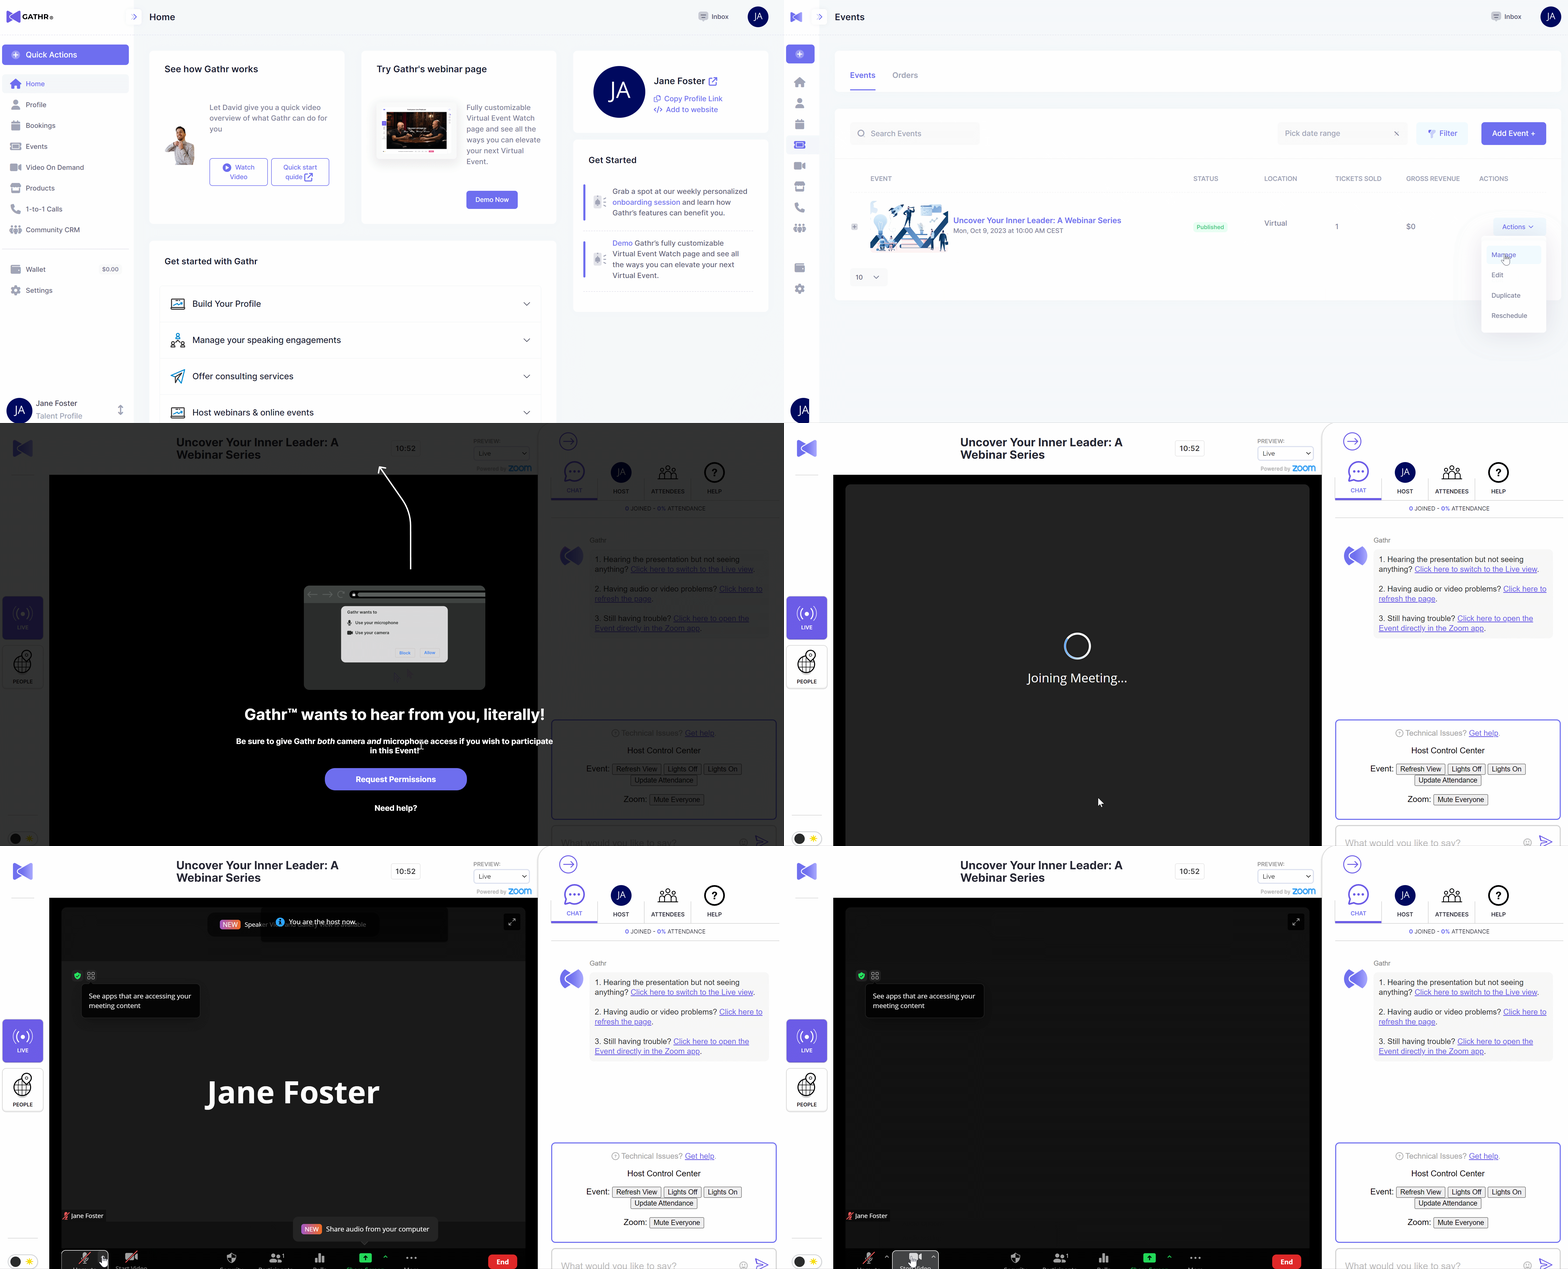
To begin your Event, navigate to your "Events" tab, and "Manage" your Event.
Next, from your Event dashboard, choose "Join Livestream."

You can join your Event up to 2 hours before start time.
If you prefer, you can also begin your Event directly from the Zoom desktop client. Your Attendees will have the same Gathr Watch page experience.
As the Host, you see the standard Zoom Meeting view, rather than the Gathr Watch page.
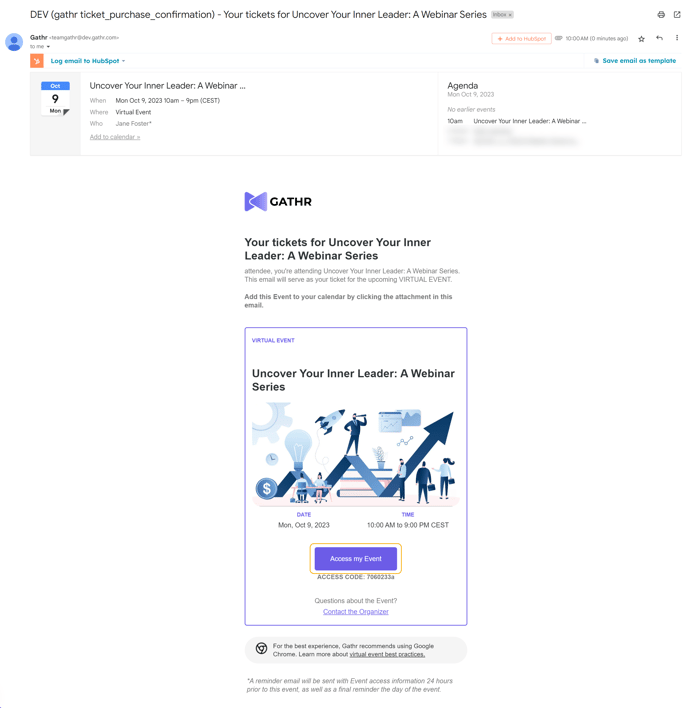
Attendees and panelists can join via the 'Access Event' link in their confirmation emails.

Your Event goes live when you start the meeting. When you do so, your Attendees will see the embedded Zoom Event directly on the Gathr Watch page.
Learn how to test your settings for Zoom Events.
YouTube Live, Vimeo Live, or Third-Party Platforms
To begin your Event, navigate to your platform of choice, access your Dashboard, and start your Event directly.
Your Event will be transmitted via your customized Gathr Watch page for YouTube Live and Vimeo Live Events. For Third-Party platforms, your Attendees will be re-directed to the link you provided when you created your Event.
For all platforms, you must allow microphone and camera permissions to your browser so that everyone will see and hear you during your Event.
OBS Studio, Wirecast (Broadcast)
Coming soon.
Related Articles:
![gathr_logo_hubspot.png]](https://support.gathr.com/hs-fs/hubfs/gathr_logo_hubspot.png?height=50&name=gathr_logo_hubspot.png)