Once you know which venue you want to book for your Event, follow these steps to add it to your Event.
4. Add Your Venue to Your Event
1. Go to Venue Profile Page
First, go to the Venue Profile page of your target Venue.
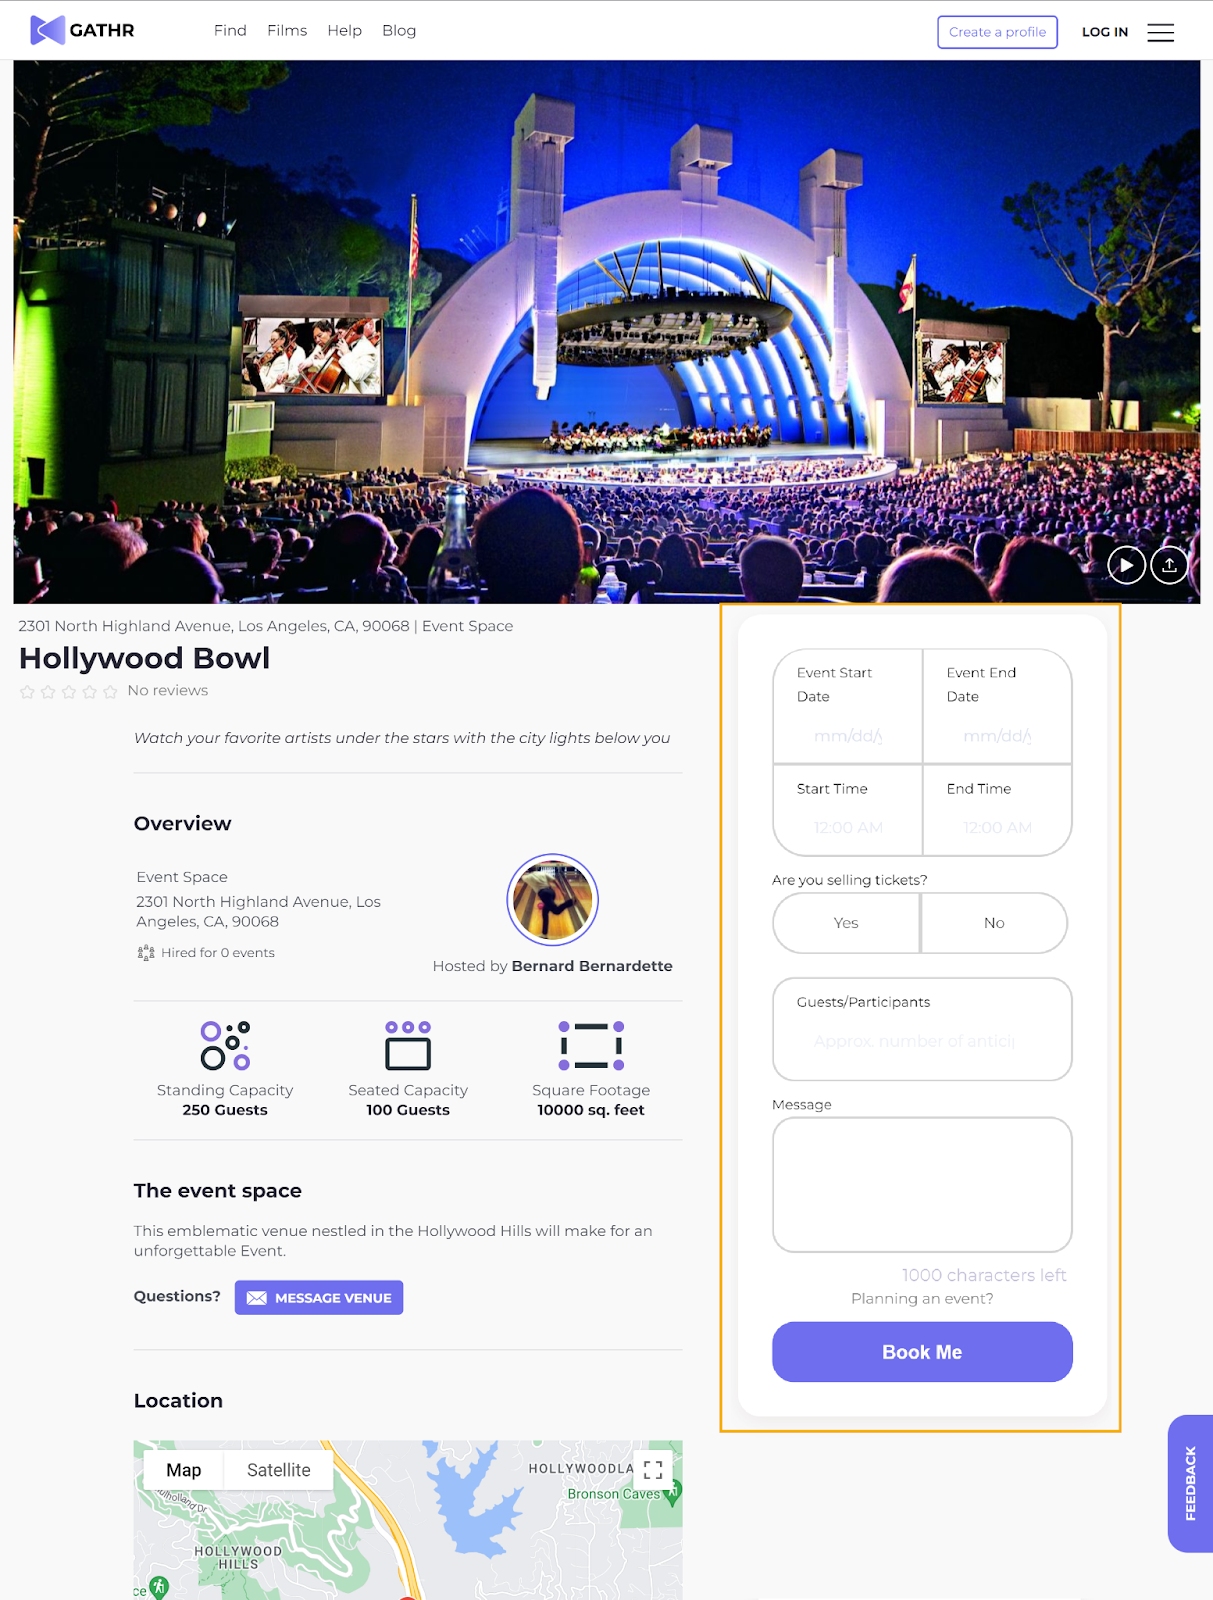
From the Venue Profile page, fill in the following fields in the form on the right side:
- Event start date & time
- Event end date & time
- Are you selling tickets? - is it a paid Event or a free Event?
- Is this for an Event on Demand™? - Learn more about Events on Demand™
- Guests/Participants - enter how many people you expect to host.
- Message - add any relevant details about your upcoming event. For example, “we’ll bring a 20’x20’ parquet dancefloor,” or “we’ll need additional table and chair rentals for 75 guests.”
Be sure to double-check your Event dates and times, as you’ll only be able to add this Venue to your Event if the timing coincides with what you’ve input in this step.
2. Send a Booking Inquiry
After you add all the information, select Book Me to send your Inquiry to the Venue, who will respond with their offer or decline your offer.
(The Venue can also set custom fees, such as a % of ticket sales, a custom deposit % as refundable or not, or propose a new date and time for your Event.)

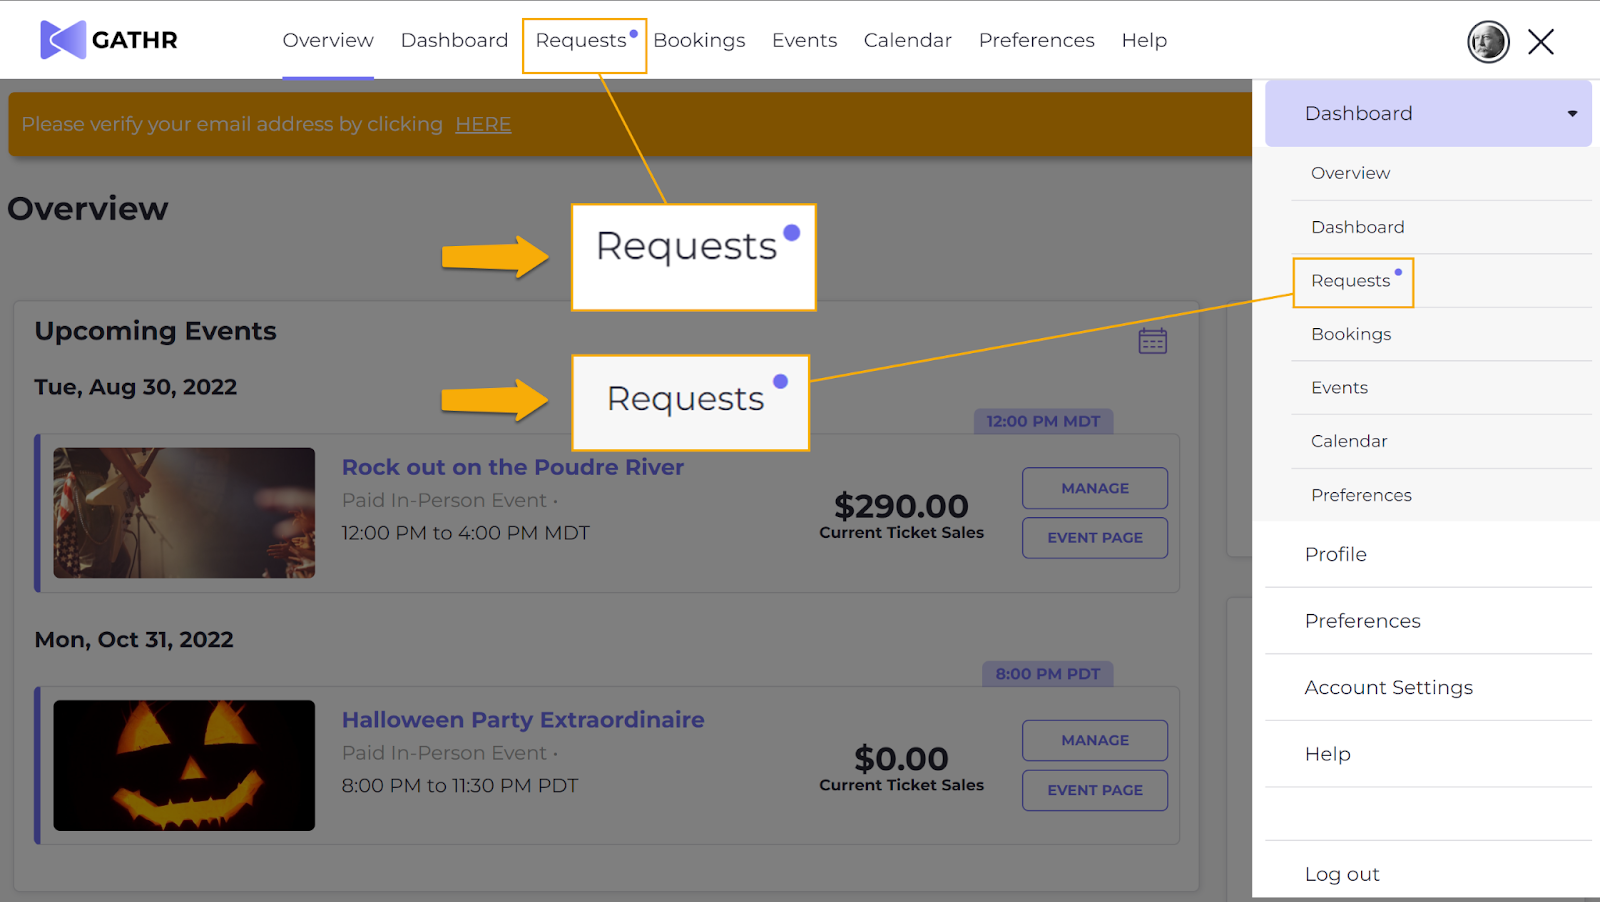
When your selected Venue responds to your Inquiry, you’ll receive an email, and see a purple notification next to Requests in your Dashboard and next to your Inbox. Use either of those to see your Venue’s reply offer.
3. Accept or Decline Offer
Now that you can see their offer, you can accept or decline it. You have 24 hours to decide.

When you accept the offer, you’ll be asked to enter your payment information to cover the payment/deposit. For Events on Demand™, payment is taken from the Event proceeds, and no payment information is required.
On this same page, you’ll be able to see your Venue’s Cancellation Policy.
When you’re ready to continue, check the box for agreement to the Terms of Use, and then choose to Pay & Confirm.

Nice! The Venue accepted payment and your Booking was confirmed.
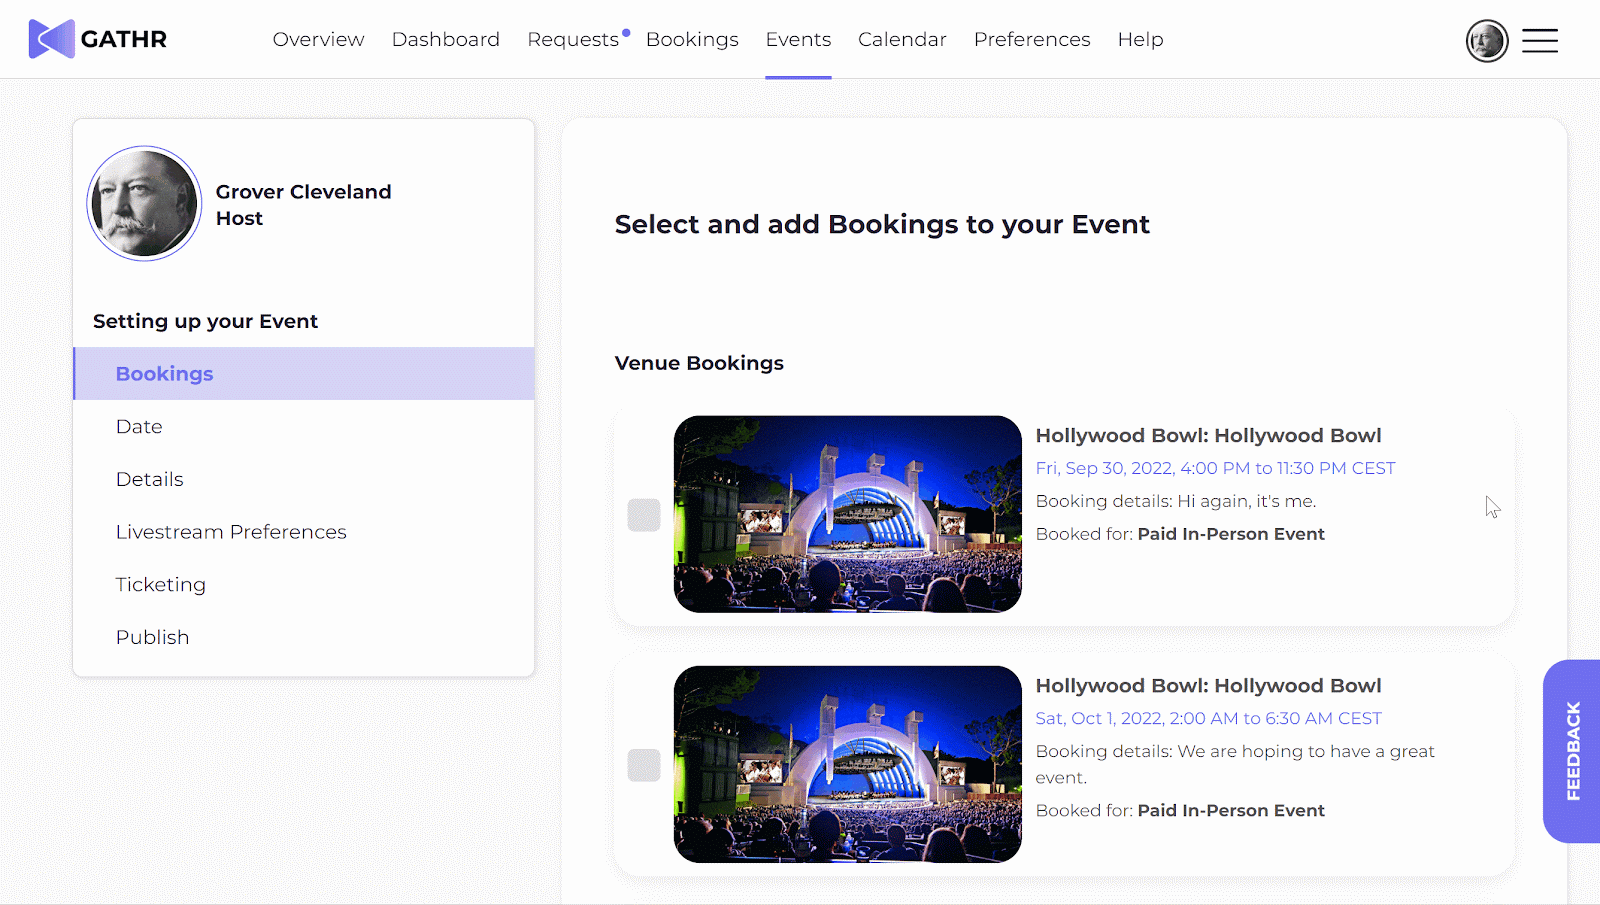
4. Add your Venue to your Event
There are two ways to add your new Venue to your Event.
Add your Venue to an existing Event
To add your Venue to an existing Event, Manage your Event from your Overview.
From Event Management select the Bookings tab on the left sidebar.
Using the checkbox, select the Venue you’d like to add to your Event, and choose Save.

That’s all it takes to add a Venue to your Event!
Add your Venue to a new Event
1. Create an Event
2. Choose a Venue to Add to Your Event
From your Bookings page, add the Venue you want for your Event.
Note the timing and payment/Event conditions of the Booking:

Next, start at #2 Set up your Event in How to Create an In-Person Event to learn how to finish creating your Event.