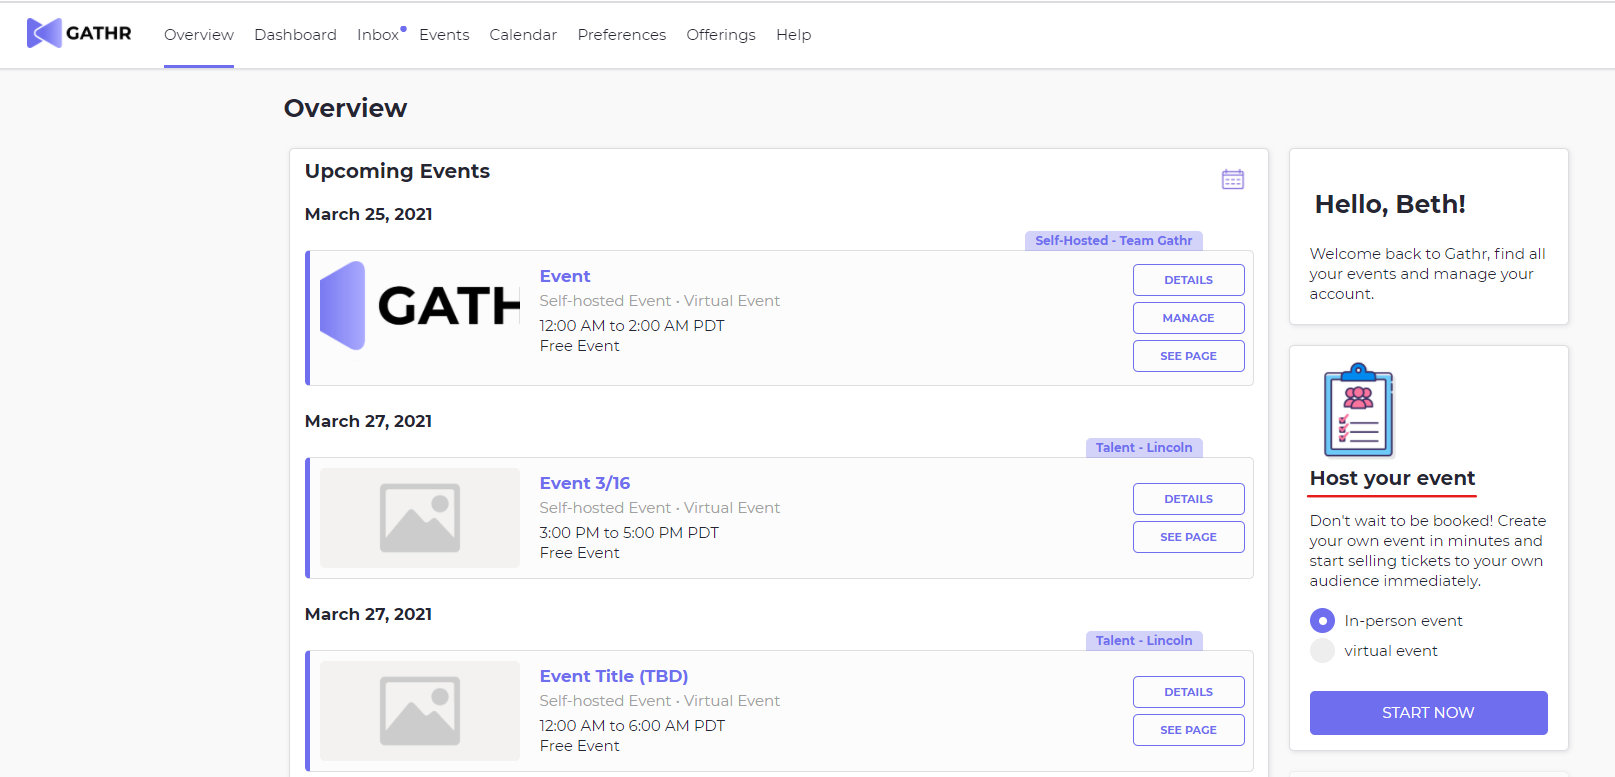
A self-hosted event is an event that you can create on your own without being booked by a third party. There are two different locations where you will be able to create a self-hosted event on the Gathr platform.
1.SELF-HOSTED EVENT CREATION Select the "Host Your Event" option from the overview page and select either "In-Person" or "Virtual" for your event.
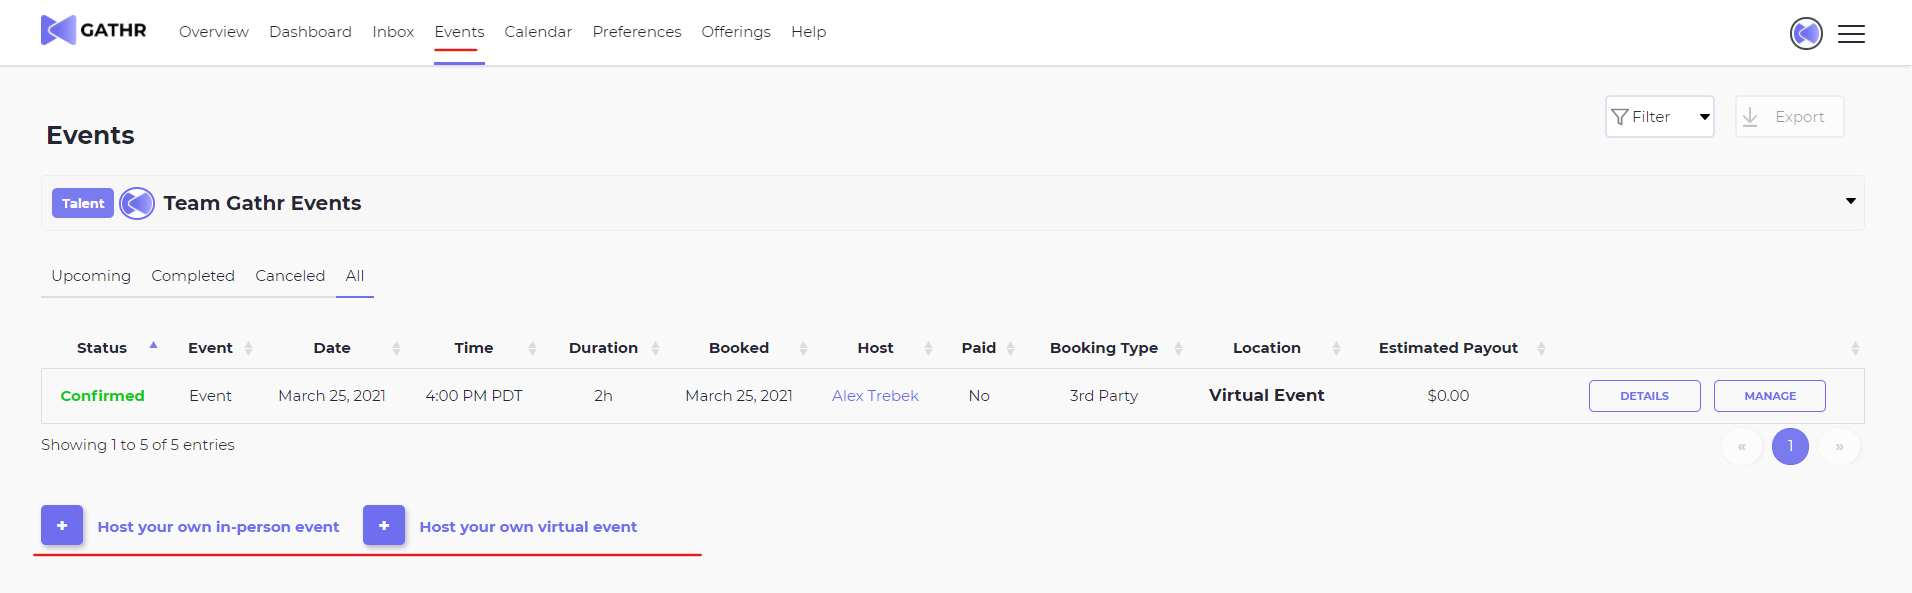
Or you will be able to do so from the bottom of the events dashboard and select either "In-Person" or "Virtual" for your event.
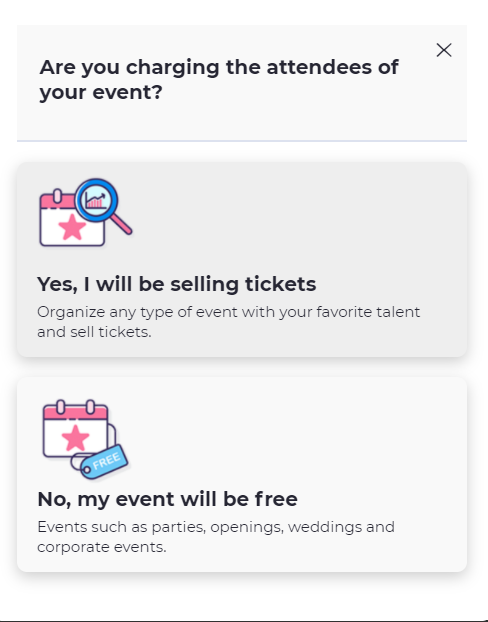
2. EVENT TYPE SELECTION Select the type of event you wish to host. A free event will allow your attendees to RSVP for your event free of charge, while a paid event will allow you to set up ticket tiers to charge your attendees.
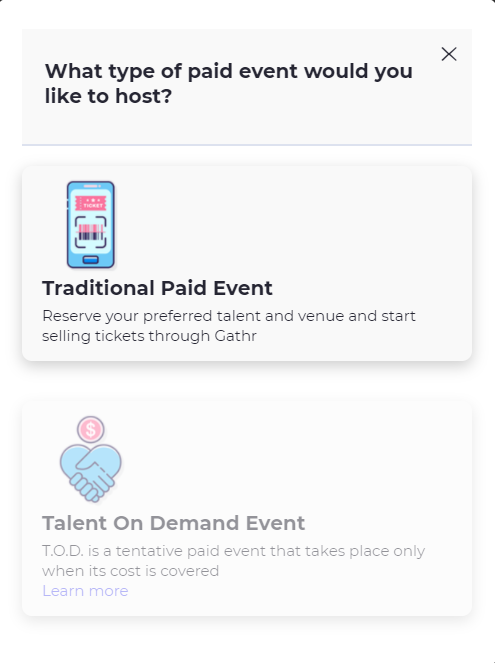
Note: For paid events, you will need to select the type of paid event you wish to host. To learn more about Talent On Demand Click Here
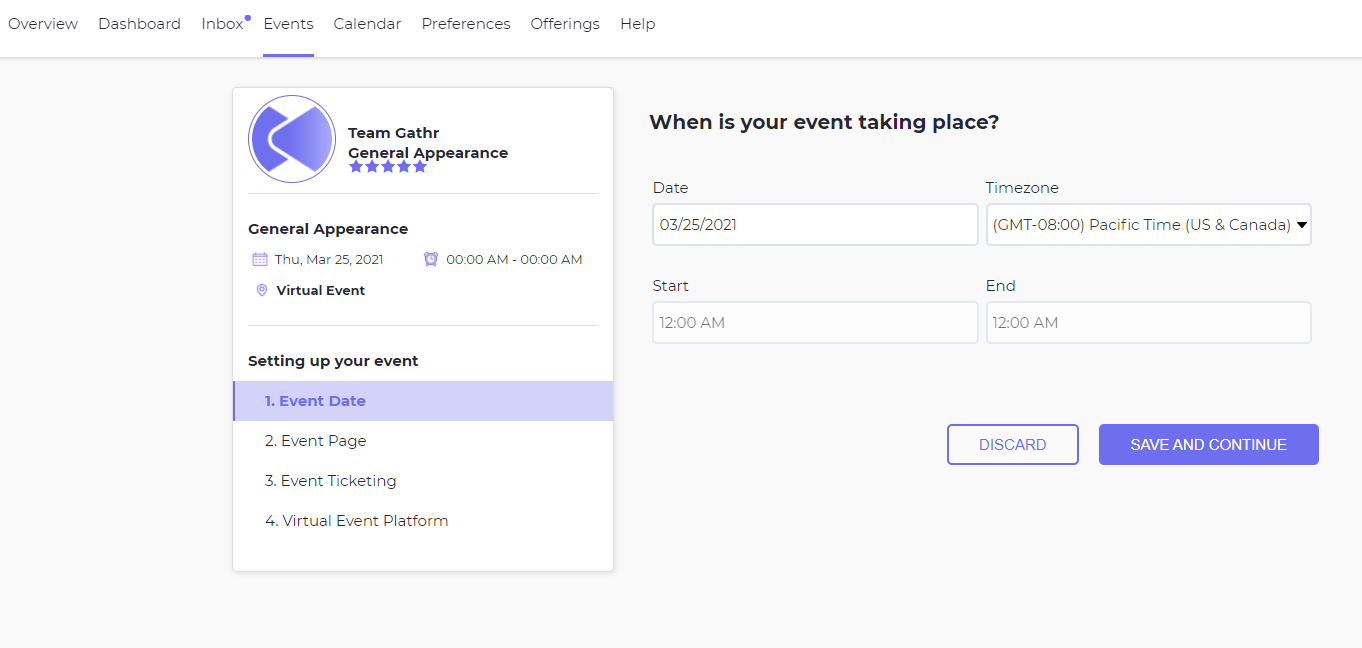
3. EVENT DATE Set the date, start time, end time, and timezone for your event.
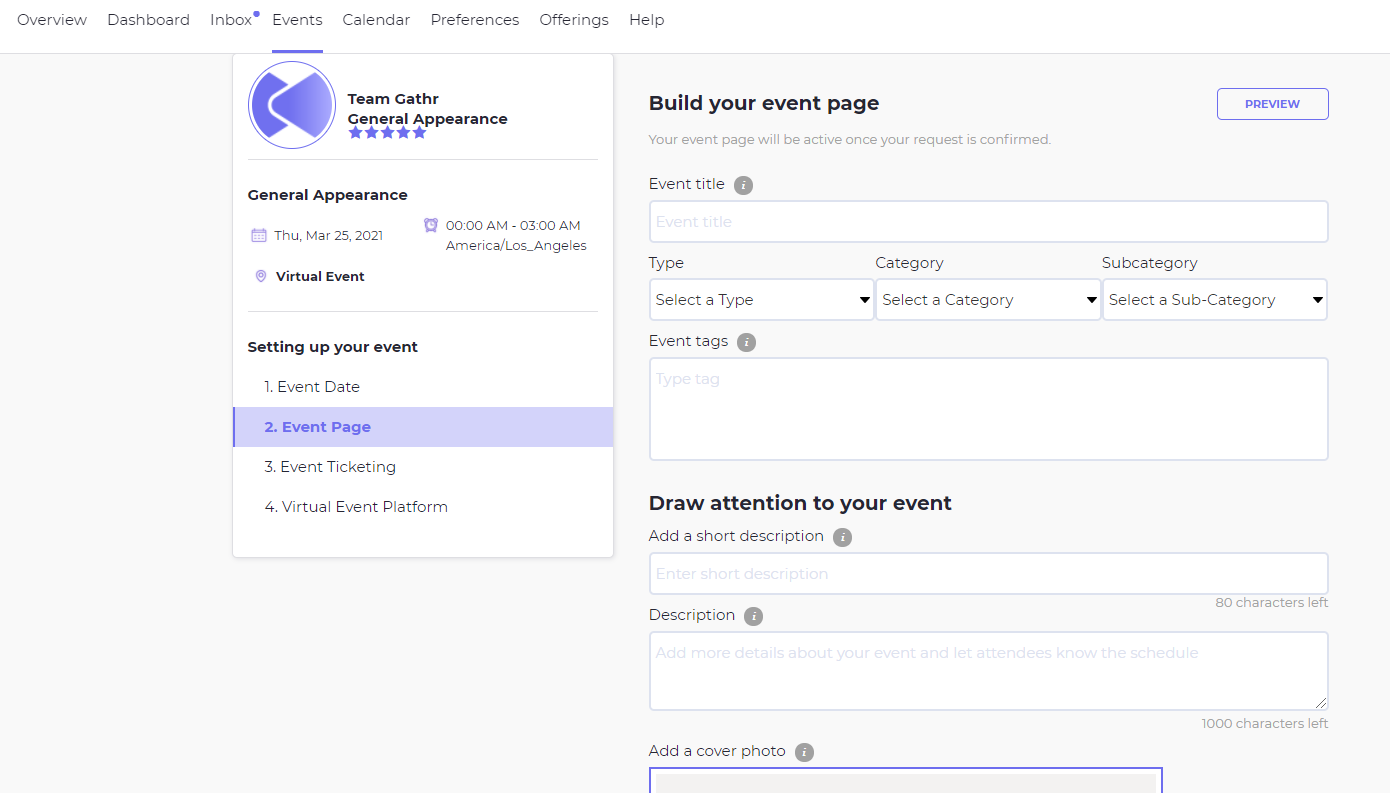
4. EVENT PAGE Build the public page for your event. You will be able to give your event a name, a description, and a cover photo to help educate potential viewers about the event. You will also be able to add event tags and classifications to make it easy for the public to search for and locate your event, if applicable.
 5. EVENT TICKETING For paid events you will enter the ticket tier information. From the ticketing page, you will be able to establish the price of your tickets. the number of tickets you will allow, and set up multiple ticketing tiers if you desire. Each tier will need to have a start date and end date for ticket sales, this feature can be found in the "Advanced Feature" section.
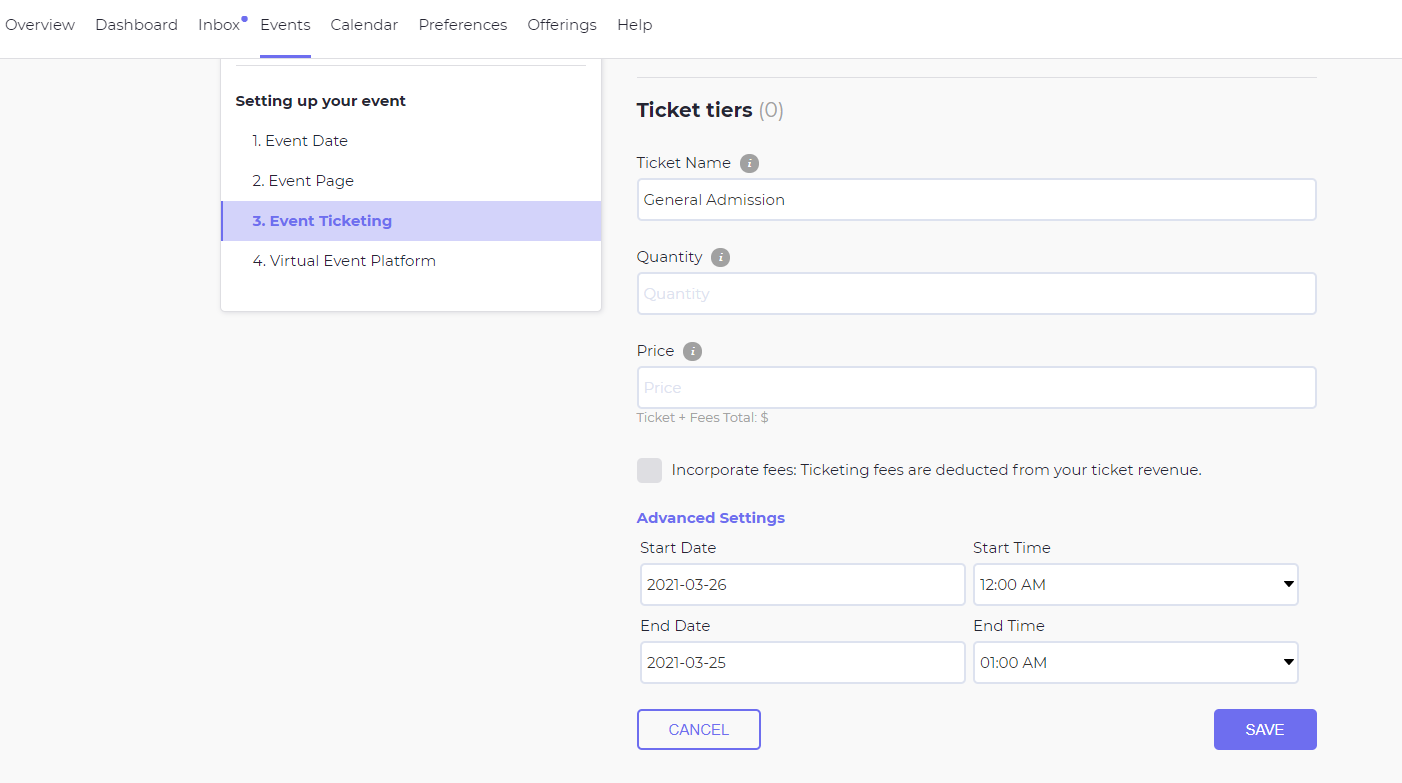
On the event ticketing page, you will also be able to use the ticketing calculator to help you establish the correct price for your tickets based on your anticipated expenses and desired profit. 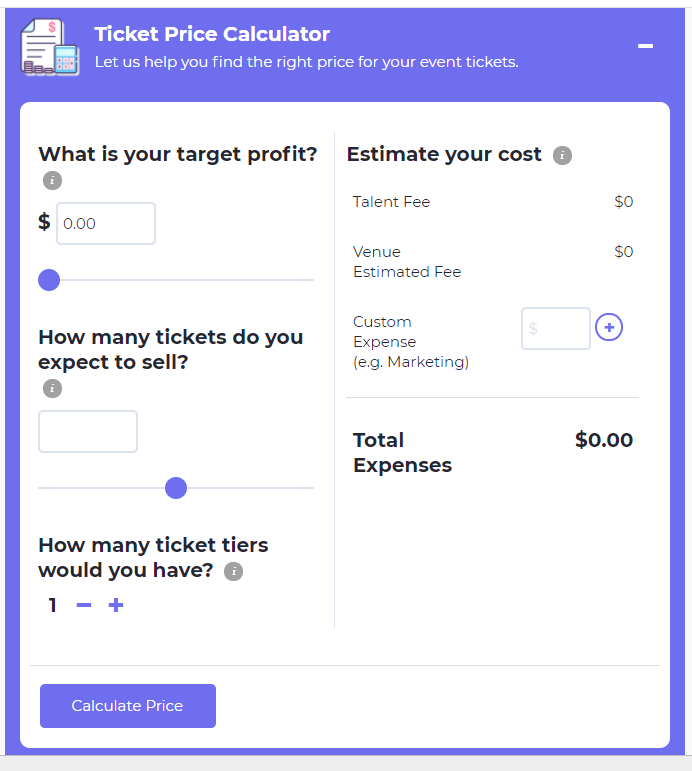
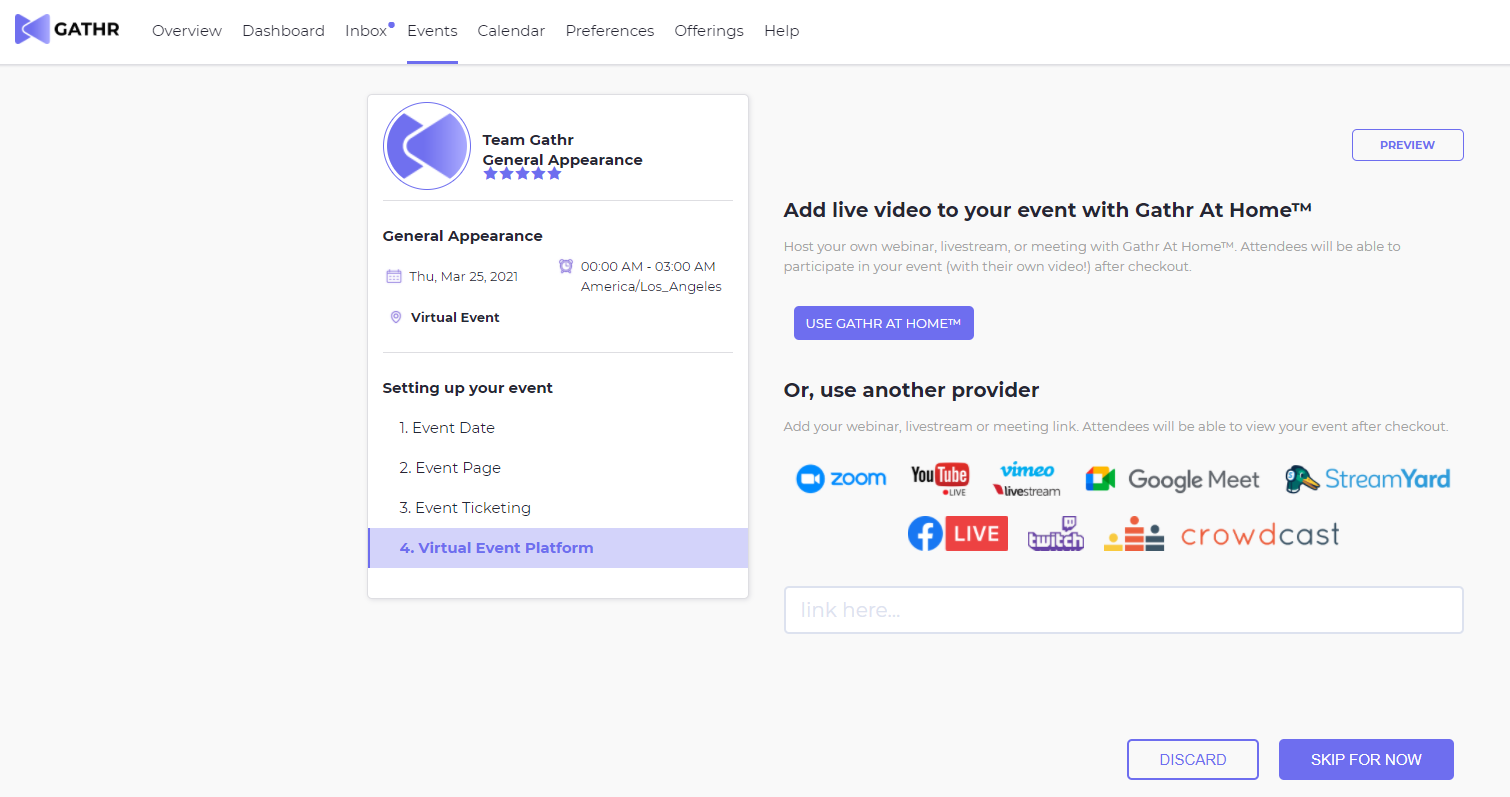
6. Virtual Event Platform: The final step of the event creation process you will be able to enter your virtual event link or create your own using Gathr at Home. You can temporarily skip this step, however, your virtual like does need to be added to the page prior to your event timing.
Note: for an in-person event you will need to enter your event space information at this time.
Once all steps are completed and saved, your event will be created and you will be redirected to your event management dashboard.