Looking to host a visually interactive virtual Event, where you can see your Attendees on-screen? Learn how to set up your Gallery Event in a few short steps.
- Create a virtual Event
- Set up your Event - Fill in some basic information about your Event.
- Create your Event page - Build interest in your Event by adding a cover photo, title, and other descriptors.
- Set up your livestream preferences - Shape Attendees' Event experience.
- Enter ticketing information - Set a price that makes sense for you and your Attendees.
- Publish your Event - Publish your Event privately or publicly.
- Start your Event
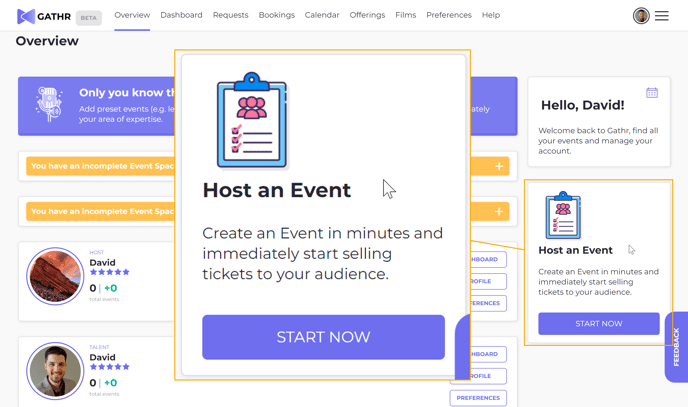
1. Create your Virtual Event
Create an Event
2. Set Up Your Event
Fill in some basic information about your Event.
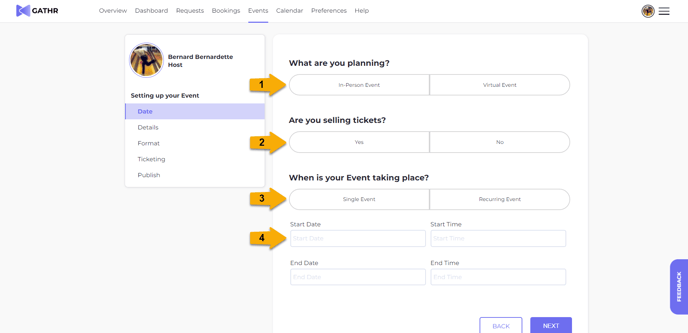
- Event type - Plan a virtual Event.
- Ticketing - Choose to sell tickets or have a free Event.
- Single Event or Recurring Event - Is this a one-off Event, or does it repeat more than once?
- Event time/date - When will your Event happen? Outline start times and dates.
What different Events are possible with Gathr? See the potential :
Looking to plan a virtual Event? Learn how to choose a virtual Event Format.
Interested in creating a Recurring Event? See how to create a Recurring Event here.
Find out more about Bookings.
3. Create your Event page
Build interest in your Event by adding a cover photo, title, and other descriptors.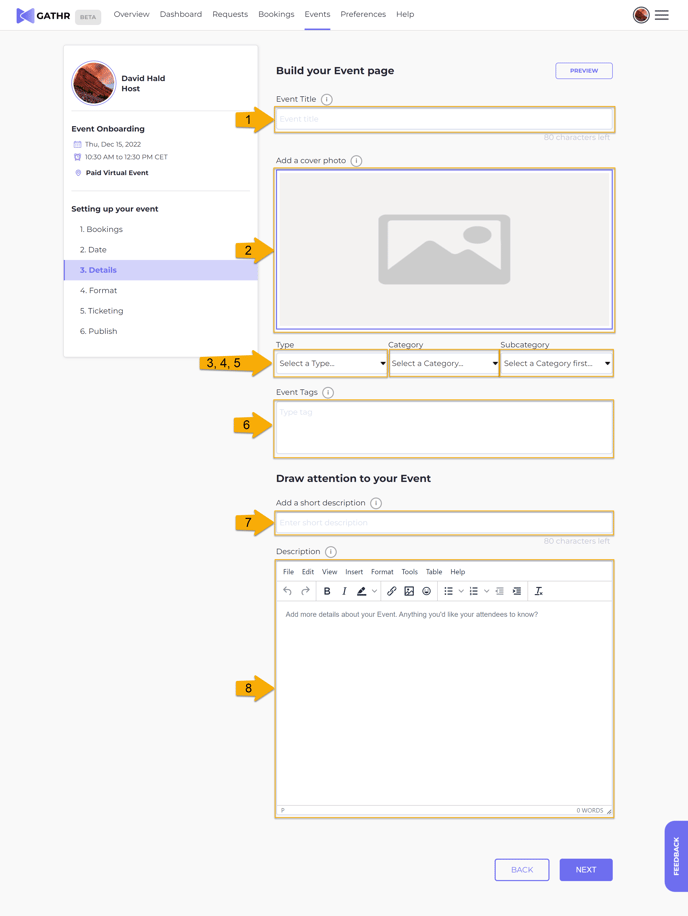
- Event Title - What's your Event called?
- Cover Photo - Add a photo to display on your Event page.
- Event Type - What kind of Event is it? (required)
- Category - Be specific to attract your target audience (required).
- Subcategory - Give your audience an idea of what they're attending (required).
- Event tags - Add keywords to set off your Event in search results (optional).
- Short Description - Give a summary of your Event.
- Description - Give details about the Event you want your audience to know.
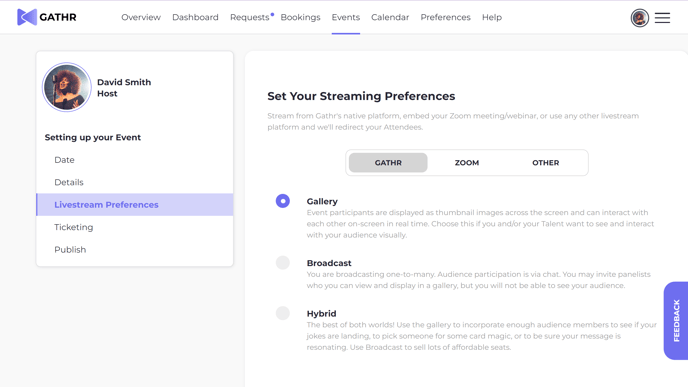
4. Set Your Livestream Preferences
Select Gathr, Gallery:
5. Enter Ticketing Information
Set ticket tiers and pricing for your Event.
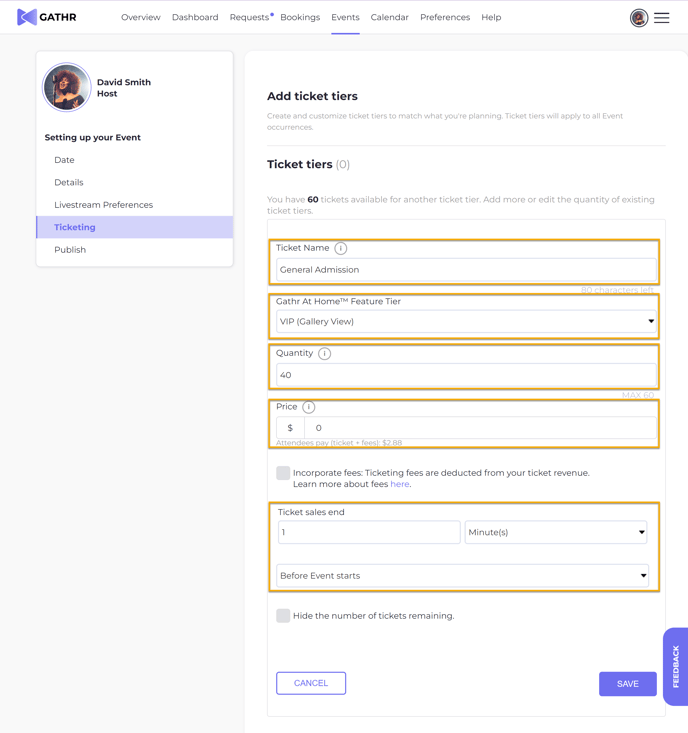
- Name ticket tiers - Attendees are used to seeing different ticket tiers. Some standard ticket tiers are:
- Early Bird
- General Admission
- VIP
- Set ticketing tiers - add multiple ticket tiers to your Event.
- Choose Quantity - Currently, Gathr Gallery supports up to 190 Attendees.
- Price - Set your ticket price if it's a paid Event.
-
- You can choose to include fees. Find out more about our fees.
- Ticket Sales End - Adjust the End Times/Dates of your ticket sales.
6. Publish your Event
Make your Event Public or Private.
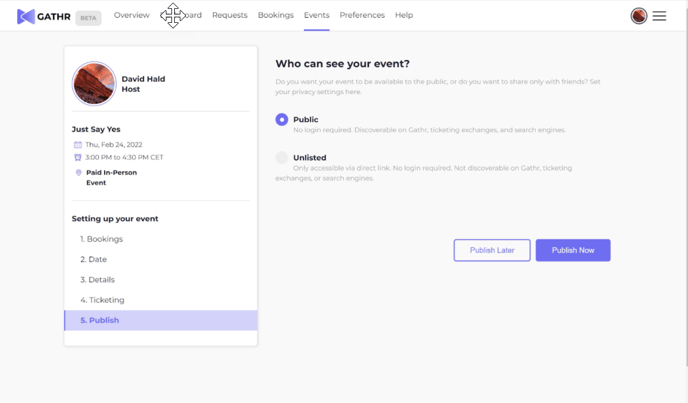
Privacy Settings
-
-
- Public - anyone with the link can view the Event page, or find your event on Gathr.com, via search engines and ticketing outlets.
-
-
-
- Unlisted - your Event won't be discoverable on Gathr.com, search engines, or ticketing outlets.
- Unlisted - your Event won't be discoverable on Gathr.com, search engines, or ticketing outlets.
-
🎉 You're almost done! 🎉
The last step is to Publish your Event.
Publish Now
-
-
- Go live with your Event.
- The Event Page is visible on Gathr.com via search engines and ticketing outlets.
- Applicable ticket tiers are available for sale.
-
Publish Later
-
-
- Add the finishing touches later.
-
The event page is not visible yet.
- Cannot sell tickets yet.
- Other limitations.
-
7. Start your Event
It's showtime! Easily begin your Event from your Dashboard.
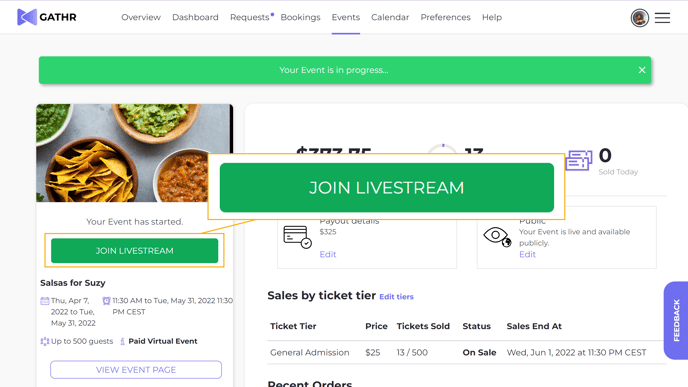
From your Dashboard, select your Event.
From your Event Management page, choose Join Livestream to start your Event, and you will be redirected to your Host view of the Event Watch page.